


I love the look of animal print cakes so imagine how excited I was when Jennifer called and ask if I could make her daughter a leopard print cake. I have never made a leopard print cake so I was super excited.

I immediately imagined "fondant" and "hand painting." Jennifer was thinking more along the lines of "buttercream" and "budget." Oh no.
There was a slight problem with this. I don't do very well with the decorator's/crusting icings. It just doesn't work for me. After dealing with major cracks and blow-outs in the early days, I had to find a better way. That is when I discovered my true love of "all butter" buttercream.

And no, it does not "crust" so I wouldn't be able to flatten it. Bummer.
Butter has it's own set of issues but I find them much easier to work with than decorator's buttercream.
I also could not imagine hand painting on an all butter buttercream cake. I am sure it could be done but I just wasn't there yet.
We were at a crossroads. I just couldn't come up with a "budget friendly" way to create a nice, clean leopard print.
Jennifer finally decided on a polka-dot cake with colors of the leopard and an electric pink bow. I wasn't too crazy about that idea but it fit the budget and I was sure it would look cute. Polka-dot cakes always seem to be cute no matter what.
I went to bed that night with "leopard print" on my mind.
I dreamed of leopard print.
...and then surprisingly...
I solved the leopard print dilemma.
Who said that?
YES! In the middle of the night, in the midst of a sleepy stupor, I developed the "grab and smash" technique in order to create modeling chocolate leopard spots quickly. No crusting buttercream. No hand painting.
Just "grab & smash!"
Lets get started...
You will need some fondant or modeling chocolate in dark brown and tan colors. I used modeling chocolate. If you use fondant it need to be a bit dry so it will develop the ragged edges when you…. "smash it down," baby!
Here is a "the best" tutorial for making modeling chocolate: How to Make Modeling Chocolate and Fix Problems.
Ice your cake smooth with buttercream. I used a light tan colored "all butter" buttercream.

Next, simply "grab" a small piece of dark brown modeling chocolate - about the size of a dime. It depends on how big you want your leopard spots to be. Then "smash" it down flat on a non-stick surface.
I used my thumb for the "smash" but if you need numerous spots, you may want to use your small rolling pin. Like, totally, ....don't wear out your thumb.
Simple, right? I mean, this is TOTALLY FIRST GRADE, people!

Next, "grab" a smaller piece of the tan colored modeling chocolate. Use half the size of the dime sized dark brown color.
Place the tan color onto the dark brown colored modeling chocolate.

Guess what you do next?
"Smash" it down, baby!
Yes, you can totally do this.

And look what we have....perfect leopard spots.
Stand back and admire your work. Brag to all your friends and family about your greatness. Call everyone you know and sing your praises.
Yes, "you" are A-M-A-Z-I-N-G!
Next, take your perfect little leopard spots and place them on your buttercream iced cake.

The more jagged they are the better. They are supposed to be "fur" you know.
I applied my ribbon and bow before I applied the spots.

A beautiful cake for someone very special.
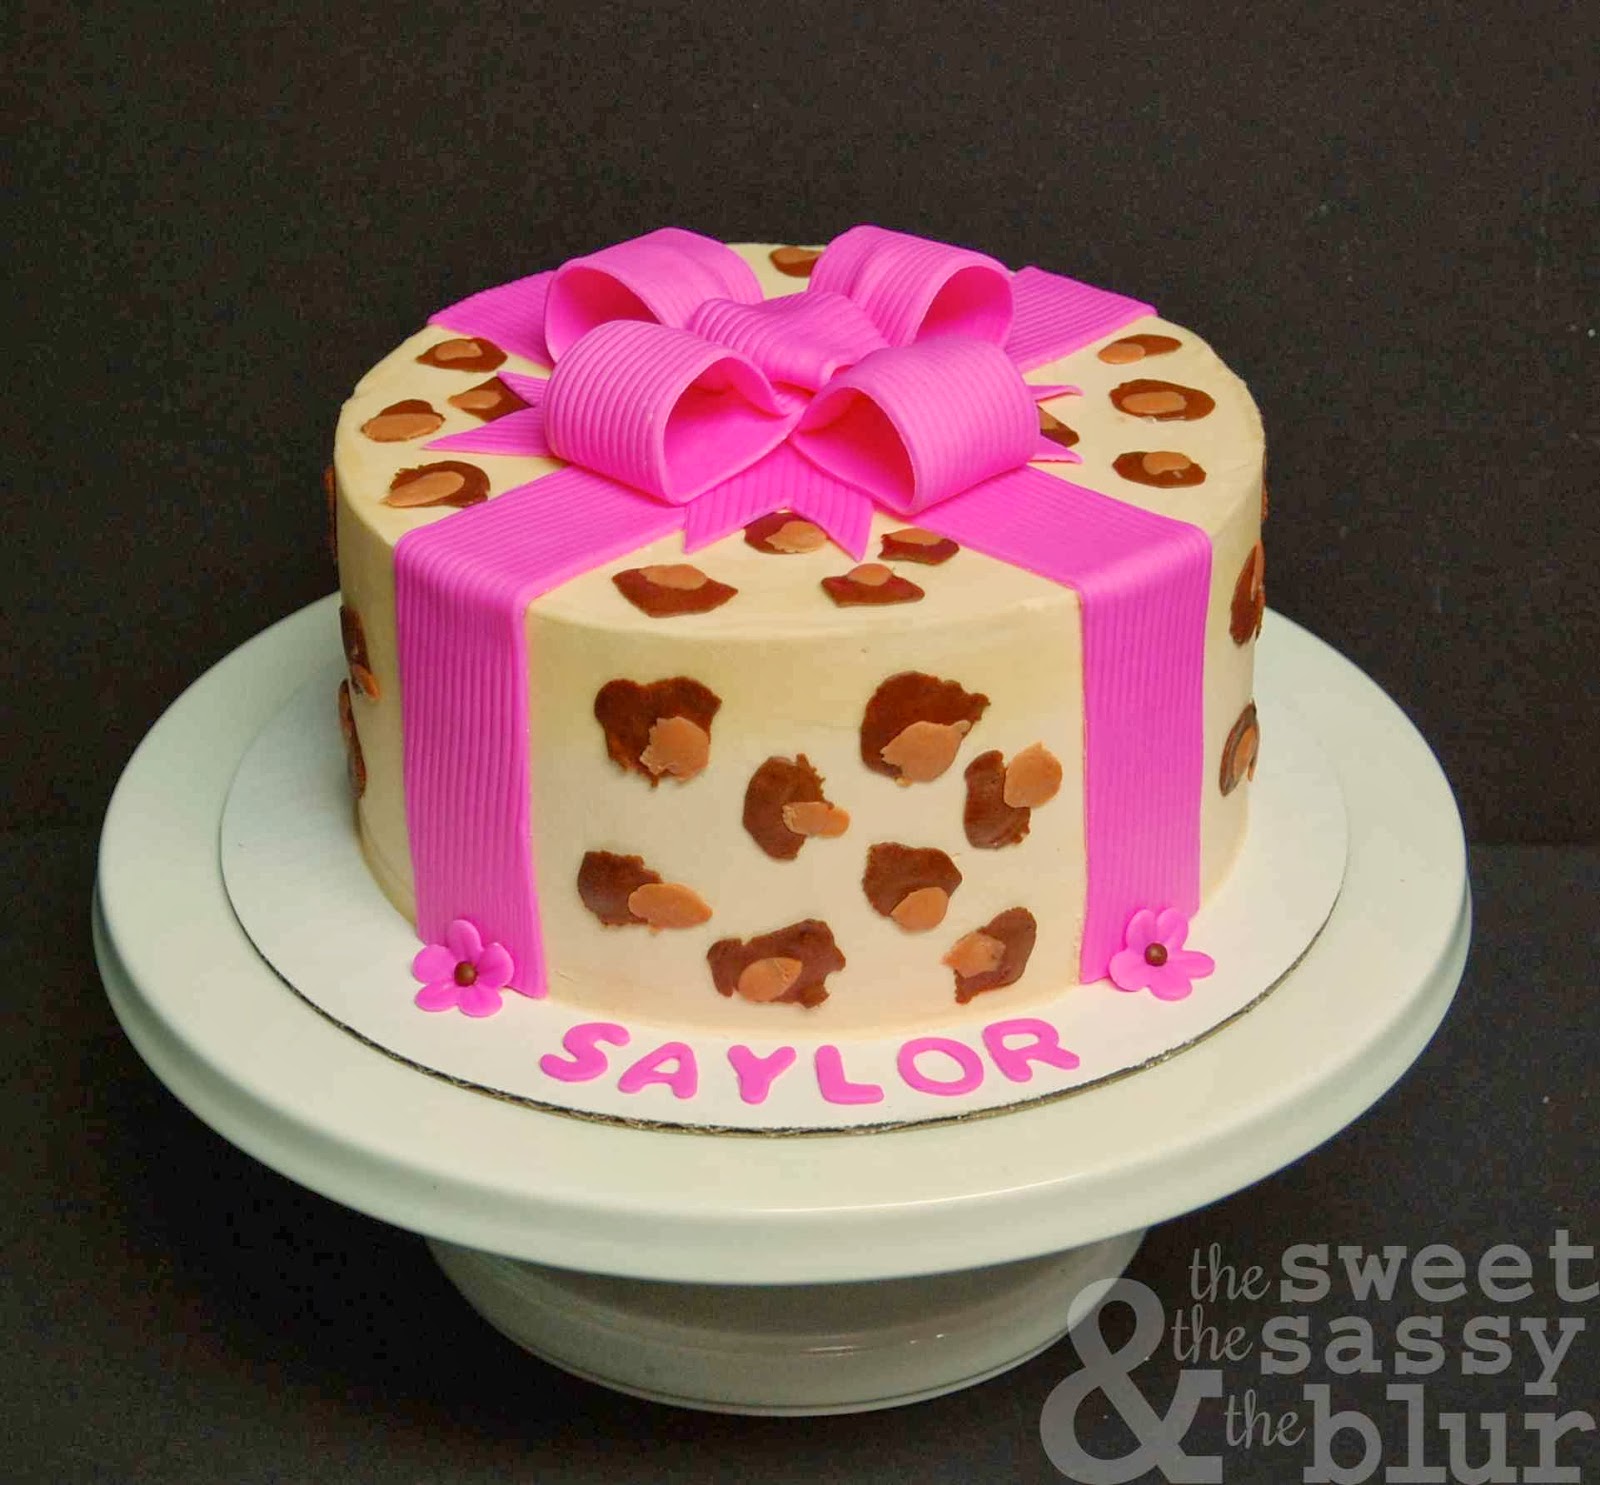
In order for the bow loops to retain their shape, I added tylose powder to the pink fondant. I mixed approx. 1/2 tsp. of tylose into a golf-sized ball of fondant. The amount of tylose will vary depending on the humidity conditions in your area.
My preferred method of making bows is to use 100% gumpaste. That can be a bit of an issue when trying to match the ribbon color on the sides of the cake. Since this bow had only four loops, the tylose worked perfectly.
The one thing that I should have done.....yeah, there is always a "should have," "could have" and "would have" with cake design. Dang.
I should have applied a few leopard spots around the ribbon. I should have cut some in half so it looked like there were spots under the ribbon also. I mean, if a real leopard was wearing that bow, wouldn't there be spots under the bow also? Duuuuhhhhh. Next time.
Thanks for your visit,
BIG CAKIE LOVE to you, my friend
Donna
xo


No comments:
Post a Comment