 |
It is difficult to believe but the hubster has me convinced that the whole world does not love cake and cake design as much as I do.
I am amazed by this.
The hubster thinks I actually
spend 24/7 on “the study of the cake.”
He is wrong. I do take eating
breaks and bathroom breaks from time to time.
I mean I have to actually eat
the cakes I love so much. That "tasting
thing" you know.
So there.
If the hubster is correct
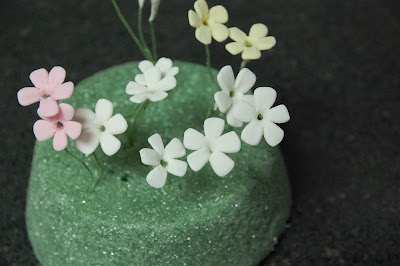
then some of you are unfamiliar with the way an actual sugar flower is
made.
Gasp.
I thought it would be cool to share some “assembly” photos along the way.
Gasp.
I thought it would be cool to share some “assembly” photos along the way.
It is not difficult to
do. It just takes a long time. I had to learn some major
patience along the way with the making of sugar flowers. Learning patience is really hard. I am not to crazy about the "waiting process" but sometimes you just have to suck it up and do it - that is "if" you want something bad enough.
Flowers made of sugar require lots of drying. Lots of waiting. Lots of patience.
The first thing is to
make gumpaste. Once you make it, it
has to be refrigerated overnight to “mature.”
Remember, that whole “things get better with age” thing? This is one of those things. Remember, that "waiting thing?" It starts now.
Once it matures make some colors for your roses. Or just leave them all white. They are pretty both ways.
Make some gumpaste cones and
attach them to a wire using a bit of sugar glue. Allow the cones to dry overnight.
Cut out some rose petals and use 2 of them to make the rosebud. Add 5 more petals. This is where you need patience…allow the petals to dry overnight.
The roses are going to need
some leaves so they won’t be naked. Cut some rose leaves with an impression
cutter. Thin the edges with a ball tool
to add a little movement. You know, like
the wind is blowing the leaves or something like that. You want it to look real.
Wire each petal so it will
stand on it’s own. Independence is a
good thing…sometimes. Right now it is
but later they will need some friends.
Yeah, let them dry
overnight. This part is a total
bummer. Waiting…waiting…waiting.
Back to the rose. Add 7 more petals and hang them upside down to dry overnight.
Wire the leaves together to
form a stem.
Add some pink petal dust to
the leaves to bring them to life. You
know, make them want to stand up and talk to you.
While everything is
drying…drying…drying…make some small blossom flowers to fill in in the
final arrangement.
Once everything has dried for
like 100 days, we can finally start putting the bouquets together. They are so life like and so real
looking.
This is our pretty white one with a little pink dust.
This is our pretty pink one. I am not too happy with how the petal dust turned out on this one. Not sure what I did wrong but definitely something is terribly wrong.
Ooops!
This is the big white one with no petal dust. Just white on white.
This is our little 2-rose bouquet which includes the other big white rose along with the purple rose. It is just amazing how these flowers looks so real.
I enjoyed making all these little parts and pieces that later turned into these beautiful flowers.
The flowers will last for years as long as you keep them dry and out of extreme humid environments. Keep them out of direct sunlight because they colors may fade over time. The big "no no" is to be very careful when you handle the flowers because they are extremely fragile and may break easily.
Now that all the flowers are made, we must "wait" a little longer....until they meet up with a beautiful cake to sit on!
Now go do something today that you will remember forever and ever and ever.....be a little crazy while your at it!
Donna
xo


No comments:
Post a Comment